Google Webmaster Tools
Google Webmaster tools (GWT) now termed as Google Search Console, is the primary mechanism used by Google to communicate with the webmasters. It is a free web service offered by Google for webmasters. It acts as a platform for Google to advice webmasters to optimize their websites and it helps the webmasters to check indexing status and errors.
Verification Steps
- Create a blog
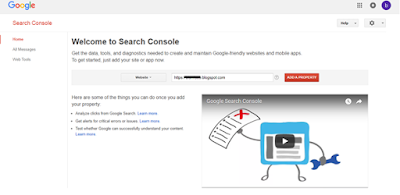
- Login into your Google Search Console account or Google Webmaster tools account i.e., https://www.google.com/webmasters/tools.
- Copy the url of the blog with ".com". The url of the blog may be showing country specific i.e., ".in" extension. If it is so, change it to ".com" extension by adding ncr (no country redirect) to the url.
For example, if our address is in country specific i.e., https://www.blogname.blogspot.in change it to no country specific i.e., https://www.blogname.blogspot.com/ncr and press enter and now the url will be changed in ".com" extension. - Now go back to webmaster tools or search console webpage and paste the url to the text field box where website address is to added.
- Click on the ADD PROPERTY button.
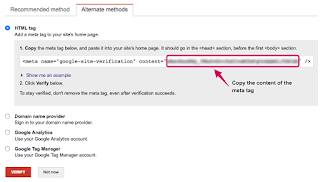
- Now we get redirected to another webpage showing various options of verification methods. From that select the option Html tag in the alternate method of search console. Copy the "meta tag " data given like <meta name=google-site-verification" content="...."/>.
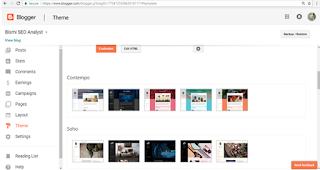
- Now go back to blogger dash board. Select the "theme" option and from that select "edit theme" which helps to edit the html of your blog template.
- Now look for the <head> in the template html code, and paste the copied meta tag in the head section and click "Save theme" button.
- Go back to search console and click "Verify" button.
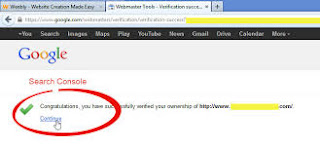
- Now a message appears with a green tick mark saying "Congratulations, you have successfully verified the ownership of your blog i.e., https://blogname.blogspot.com.
Steps for Fetching and Indexing
- Now press on the continue button of the verification message. We will be redirected our blog dashboard.
- In the left side of the dash board, select Crawl and from the dropdown list select "Fetch as Google" option.
- Now a window appears asking to enter the url.
- If we need to crawl the url, enter the entire url. Else enter the url of the page to be crawled.
- Go back to the blog, and copy the url of the blog post to be indexed. Note that we should only need to copy the part of the url avoiding the blog address part.
- Click the "Fetch" button.
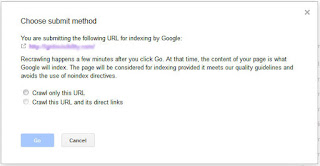
- Now a window like this appears. Now select as per your needs. If only want to crawl the particular page select first option or if you want to crawl its links also then select 2nd option and press "Go".
- Wait for indexing to complete and the process is completed.


No comments:
Post a Comment